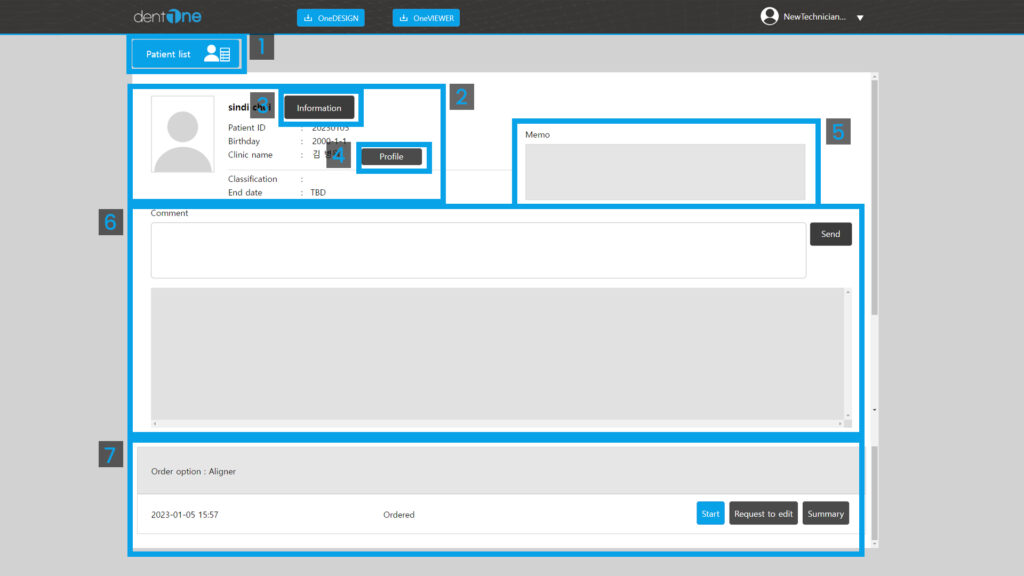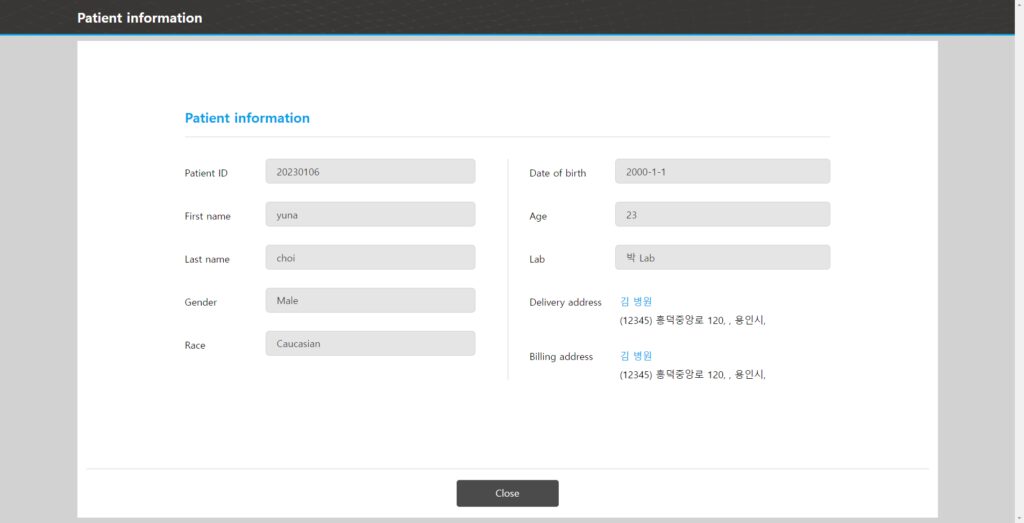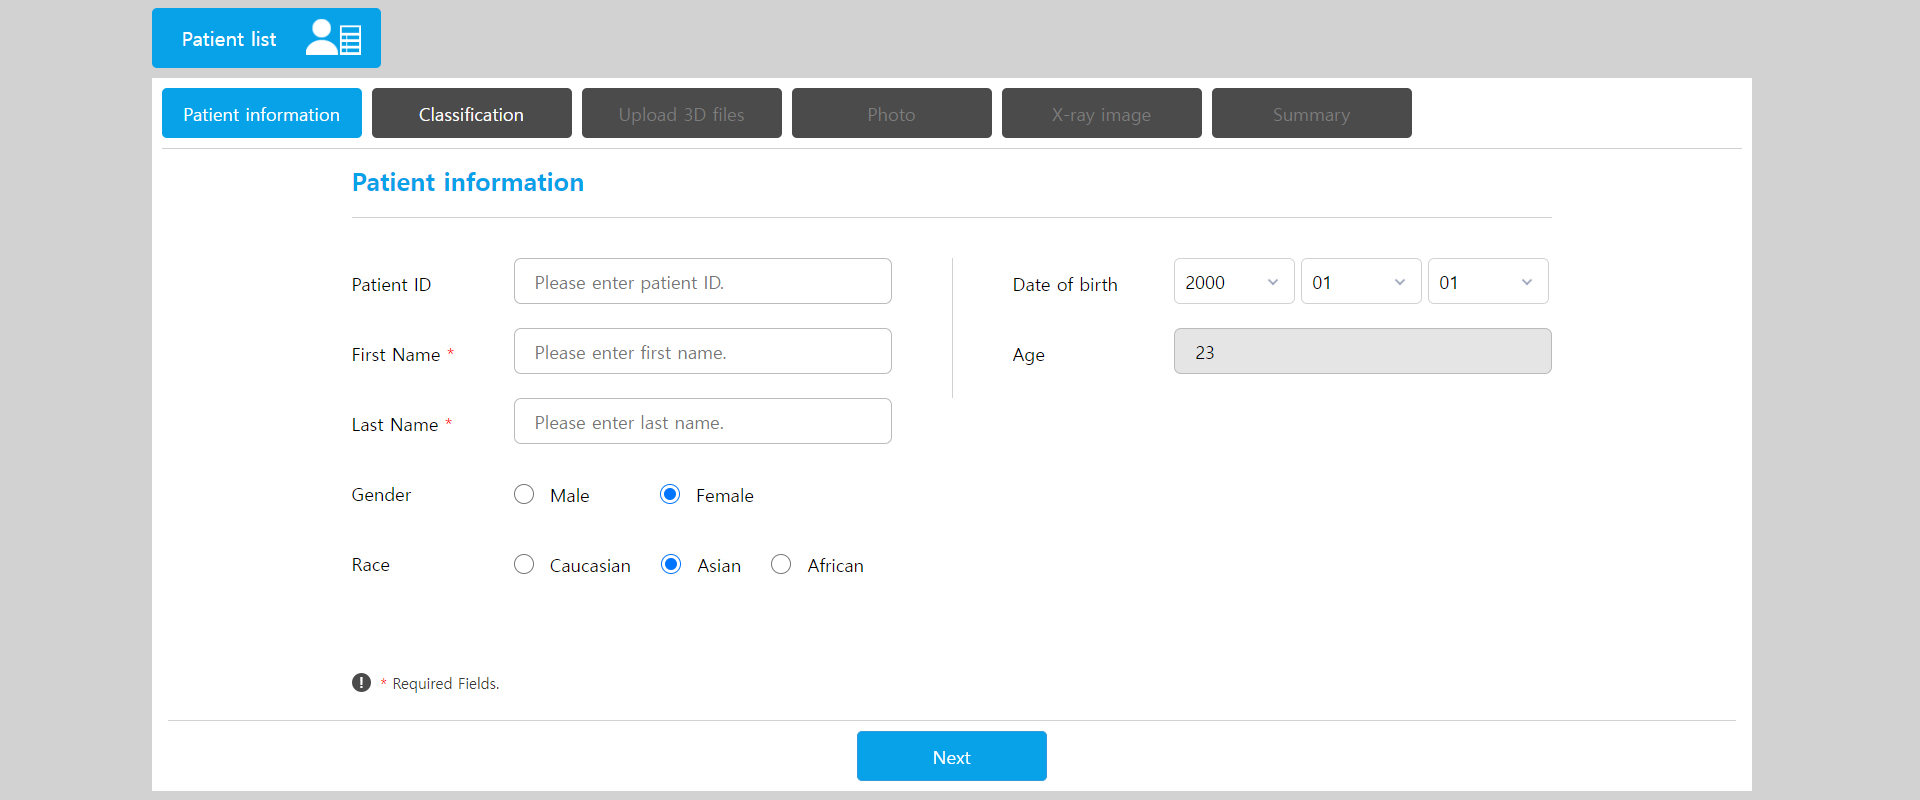
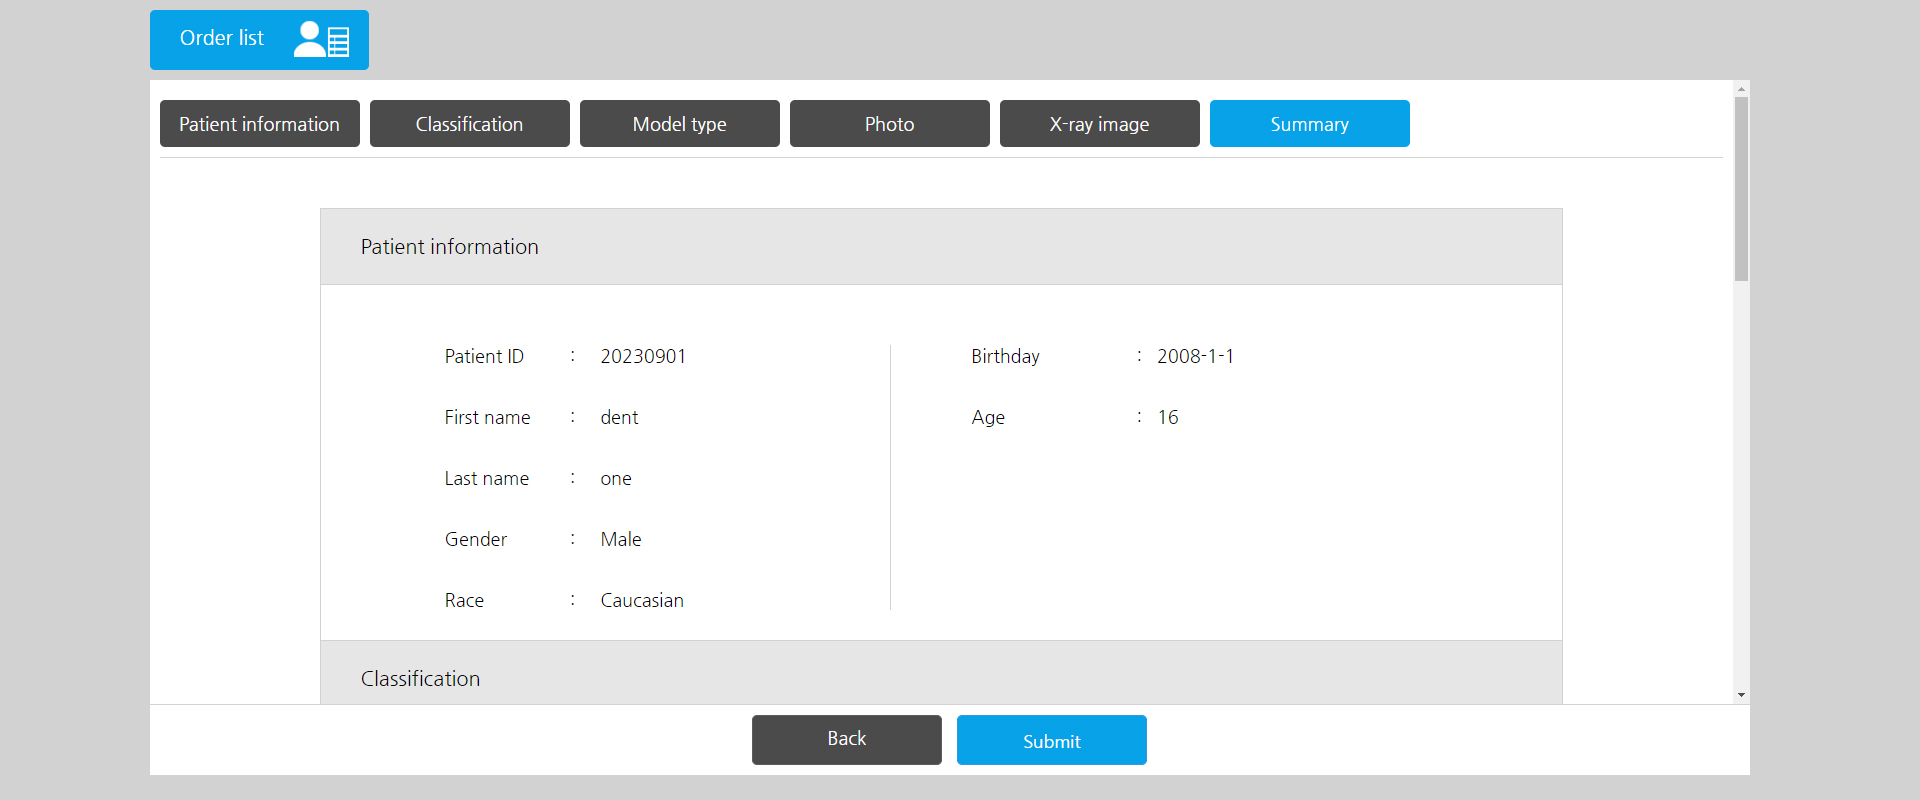
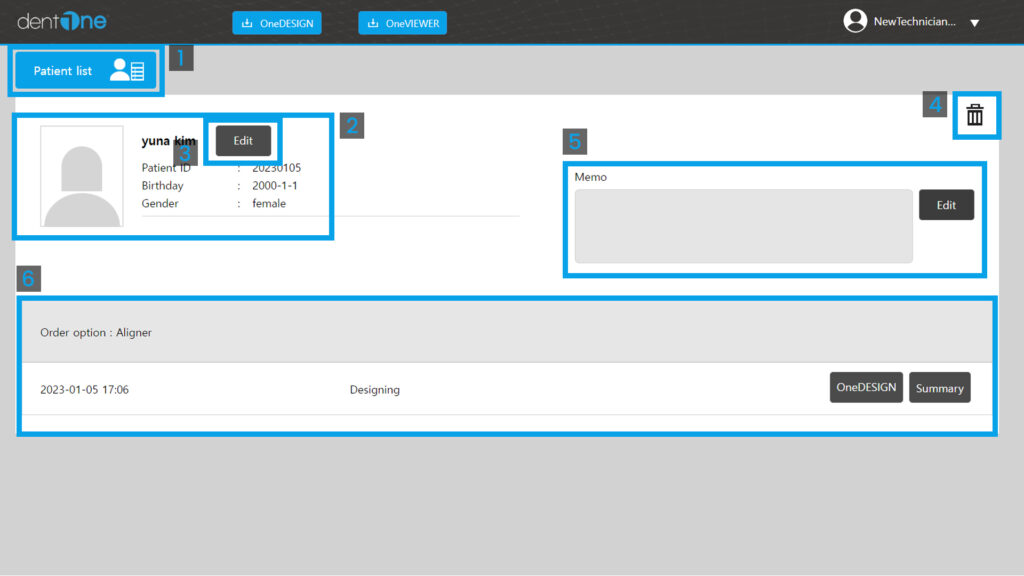
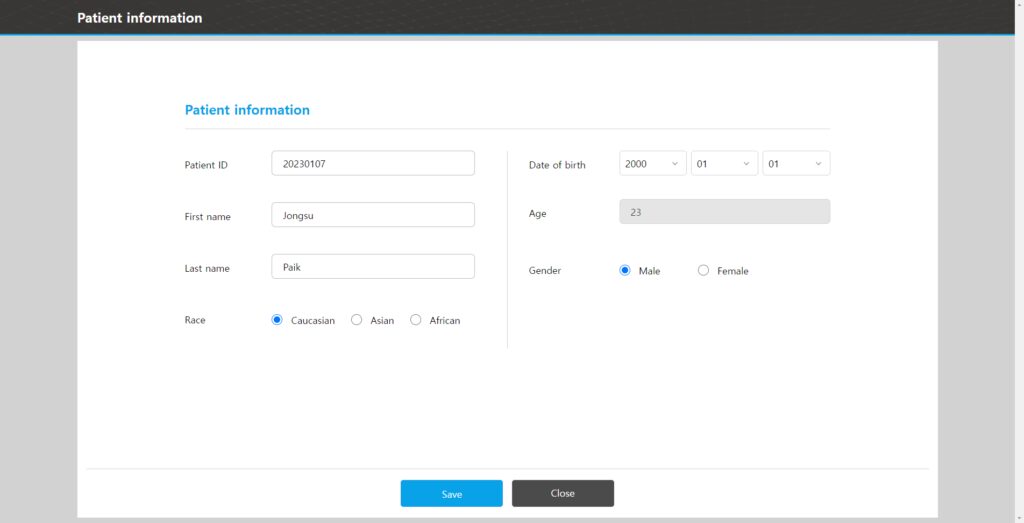
1. Patient information
※ First Name, Last Name are required.
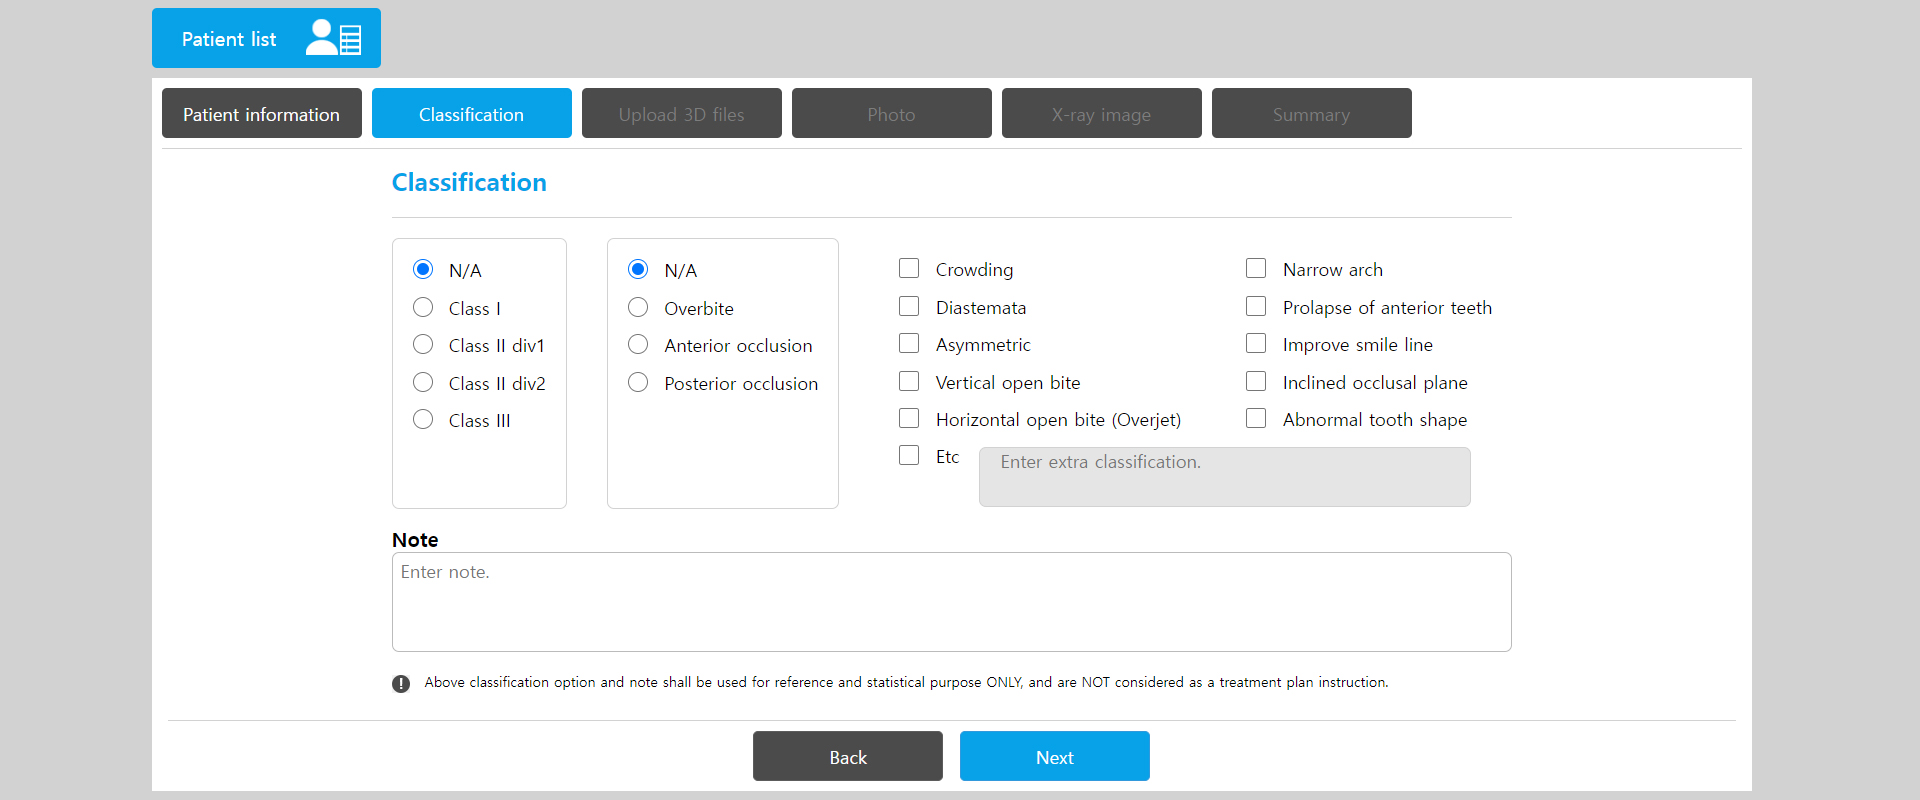
2. Classification
※ This is not a required entry.
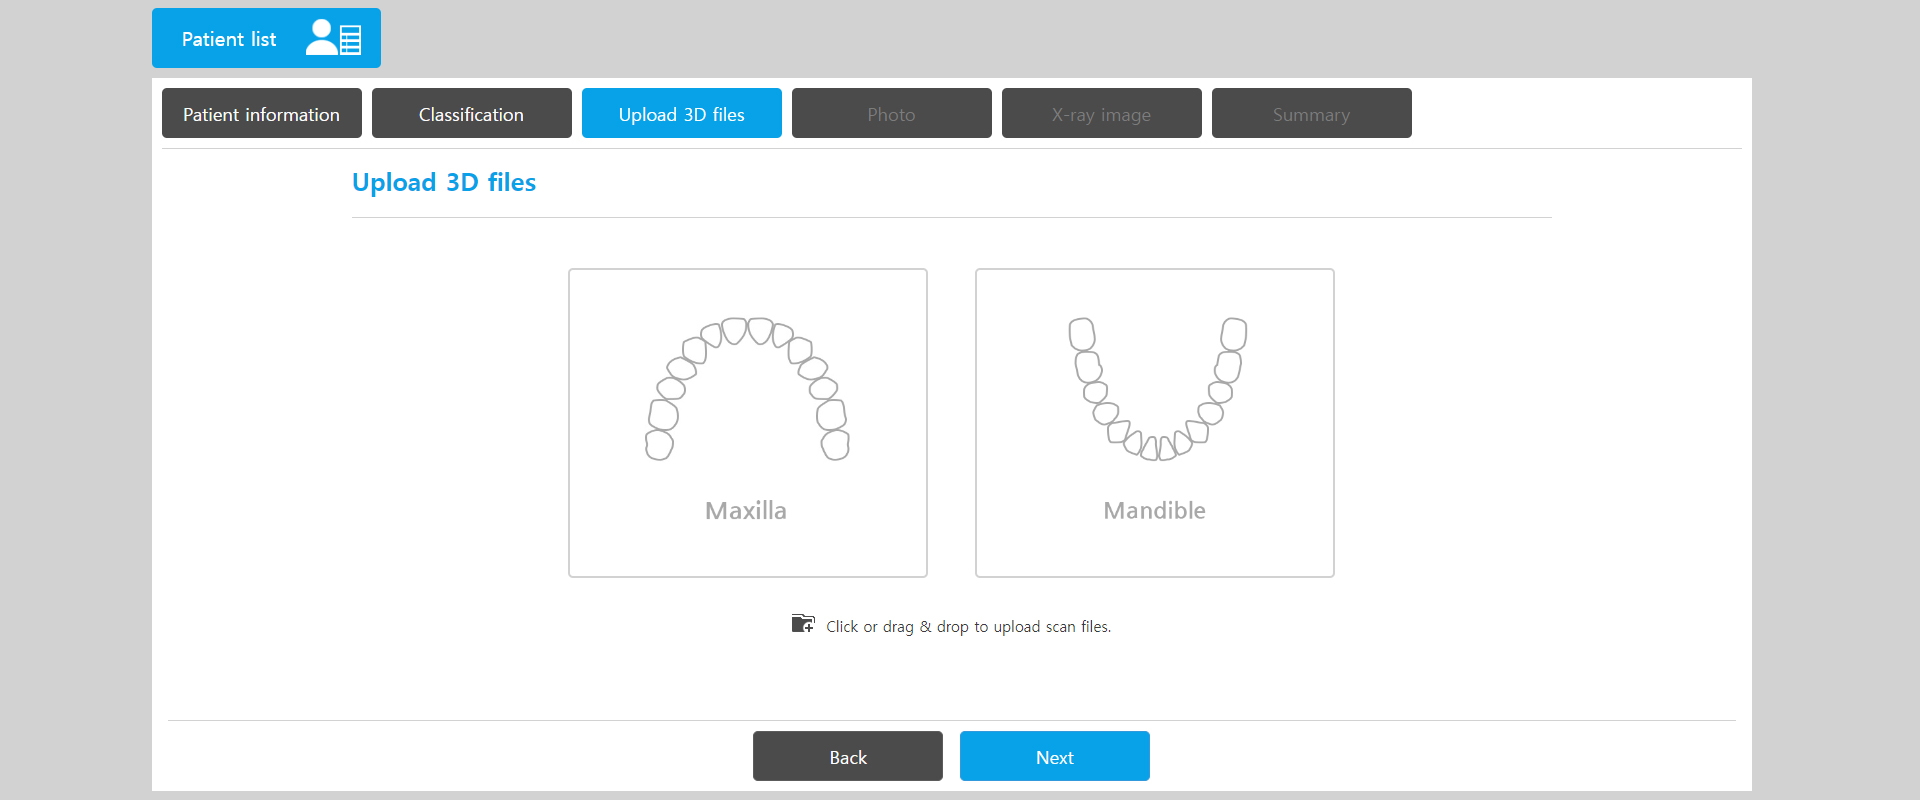
3. Model type
※ Only stl, obj, and ply formats can be uploaded.
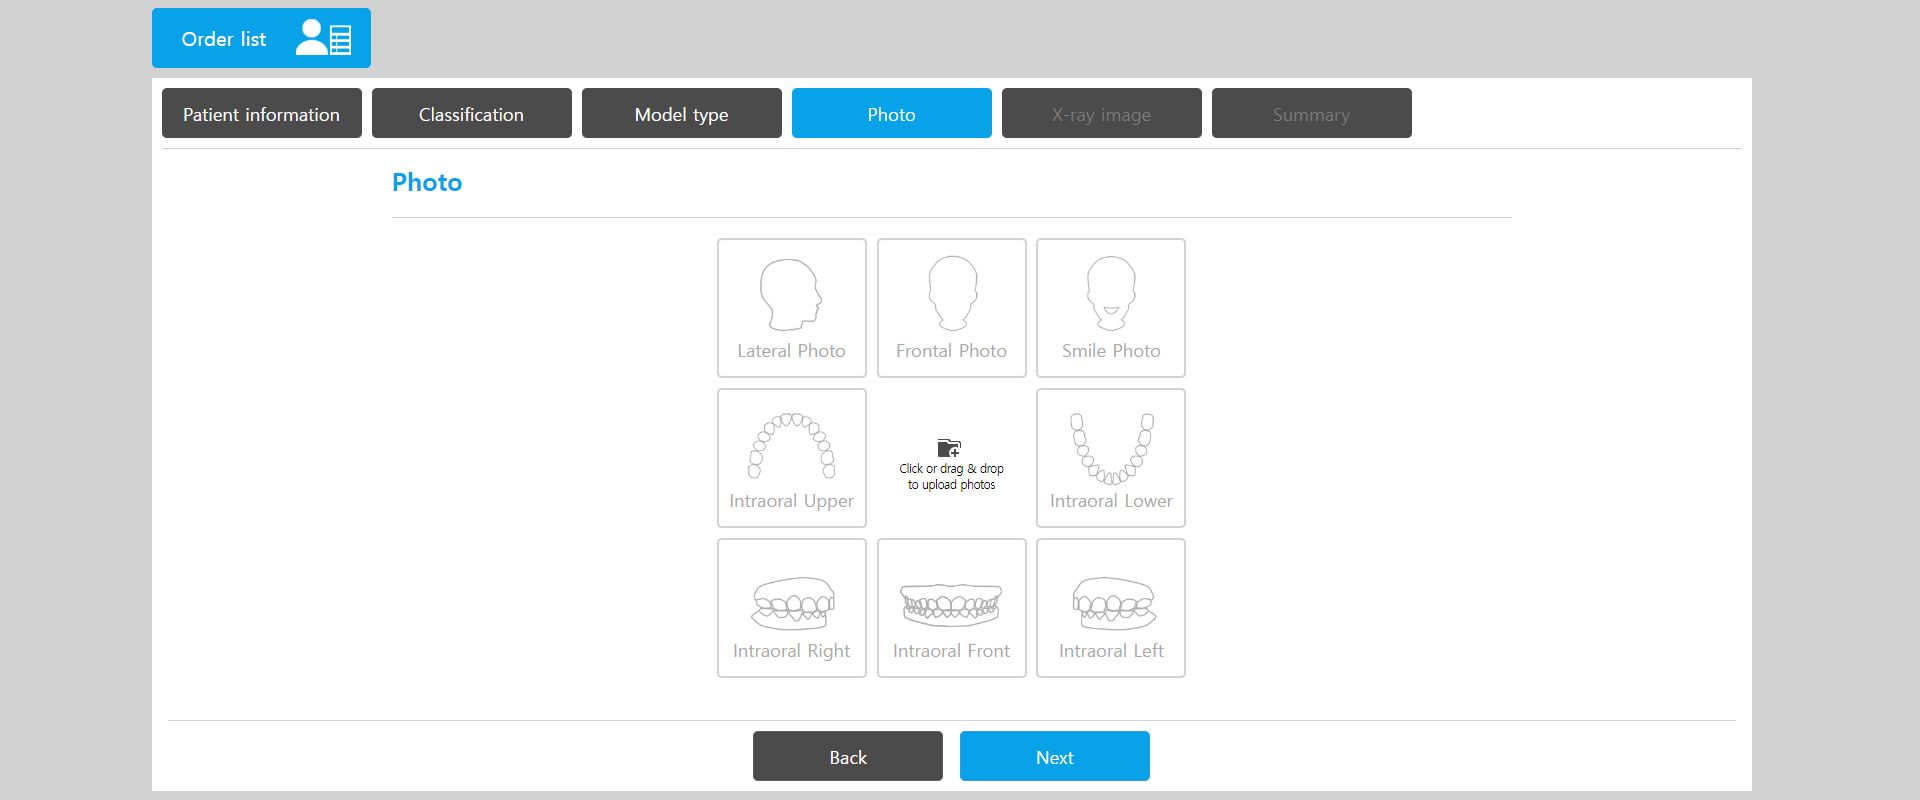
4. Photo
※ This is not a required entry.
dentOne / clear aligner / 3D Orthodontic Software

※ First Name, Last Name are required.
※ This is not a required entry.
※ Only stl, obj, and ply formats can be uploaded.
※ This is not a required entry.
※ This is not a required entry.
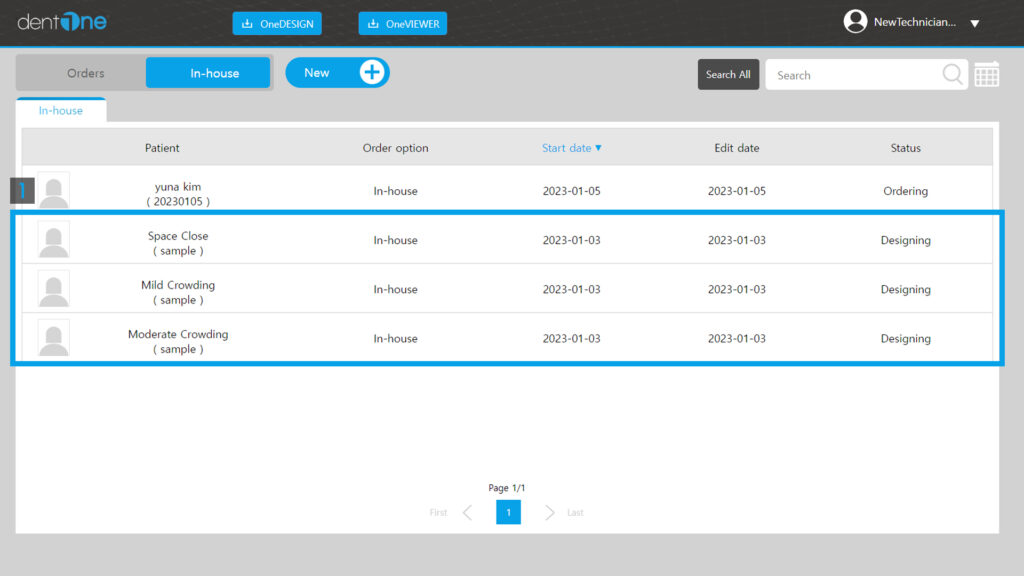

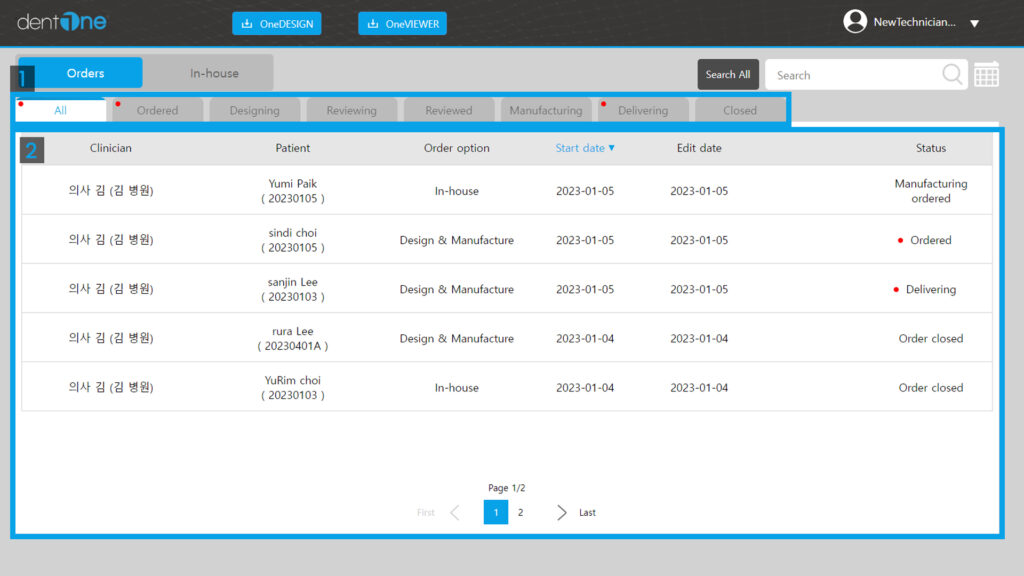
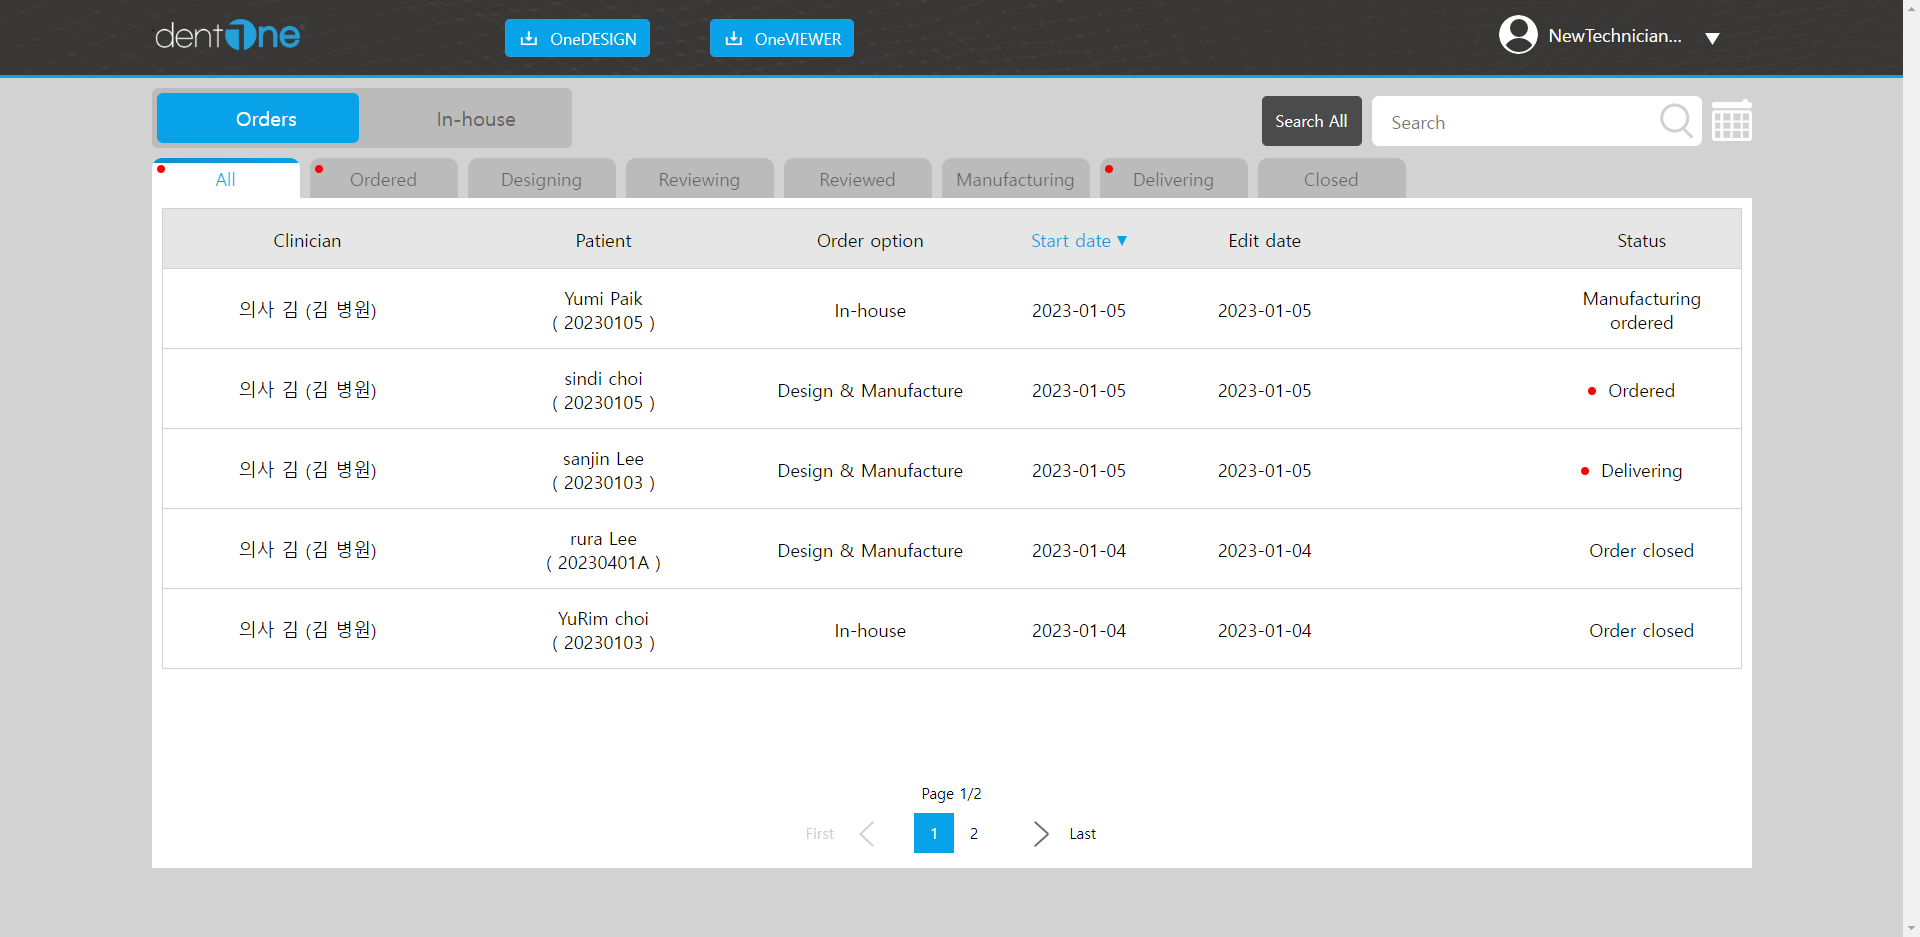
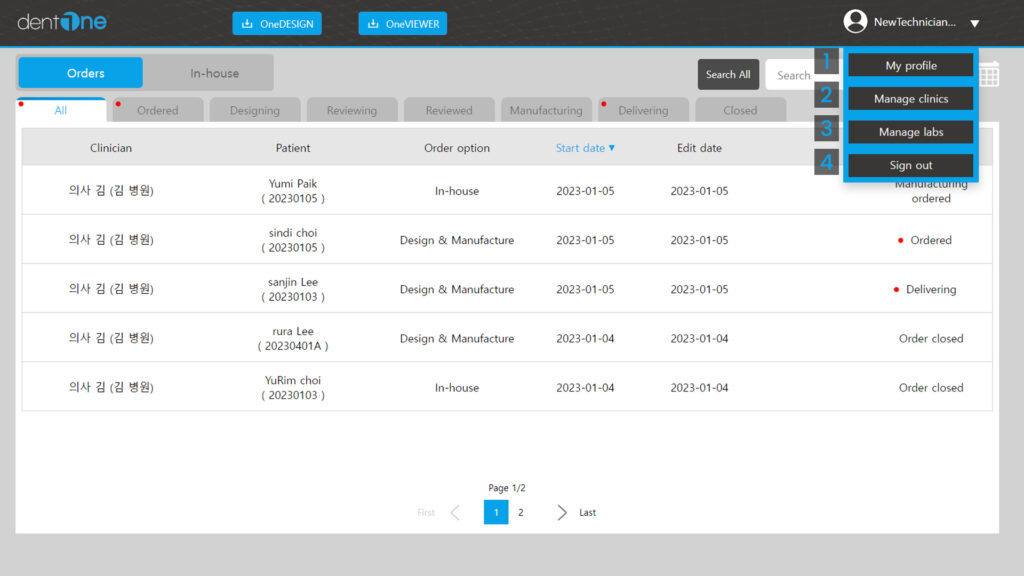
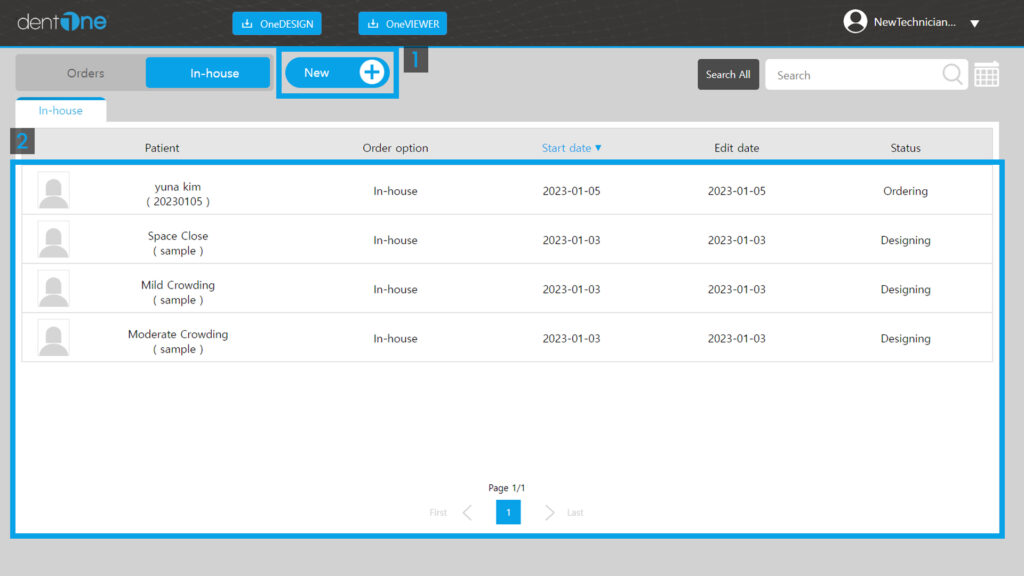
All order items are displayed.
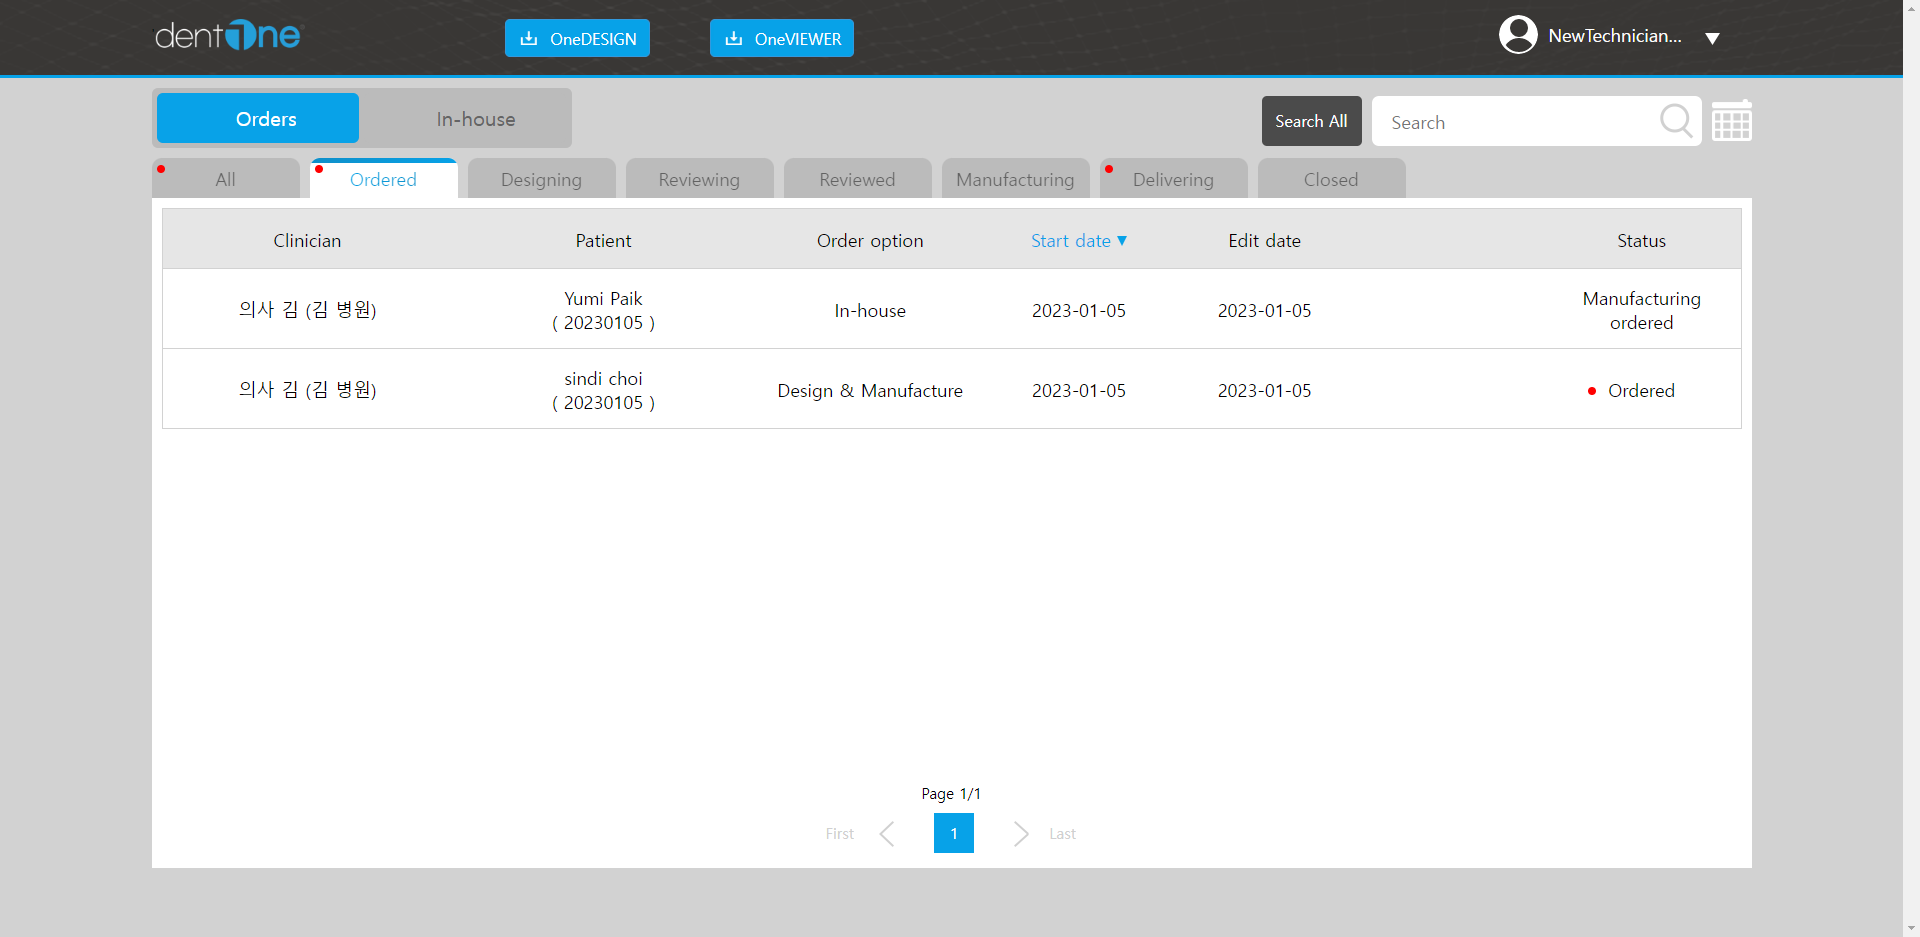
A list of orders received is displayed.
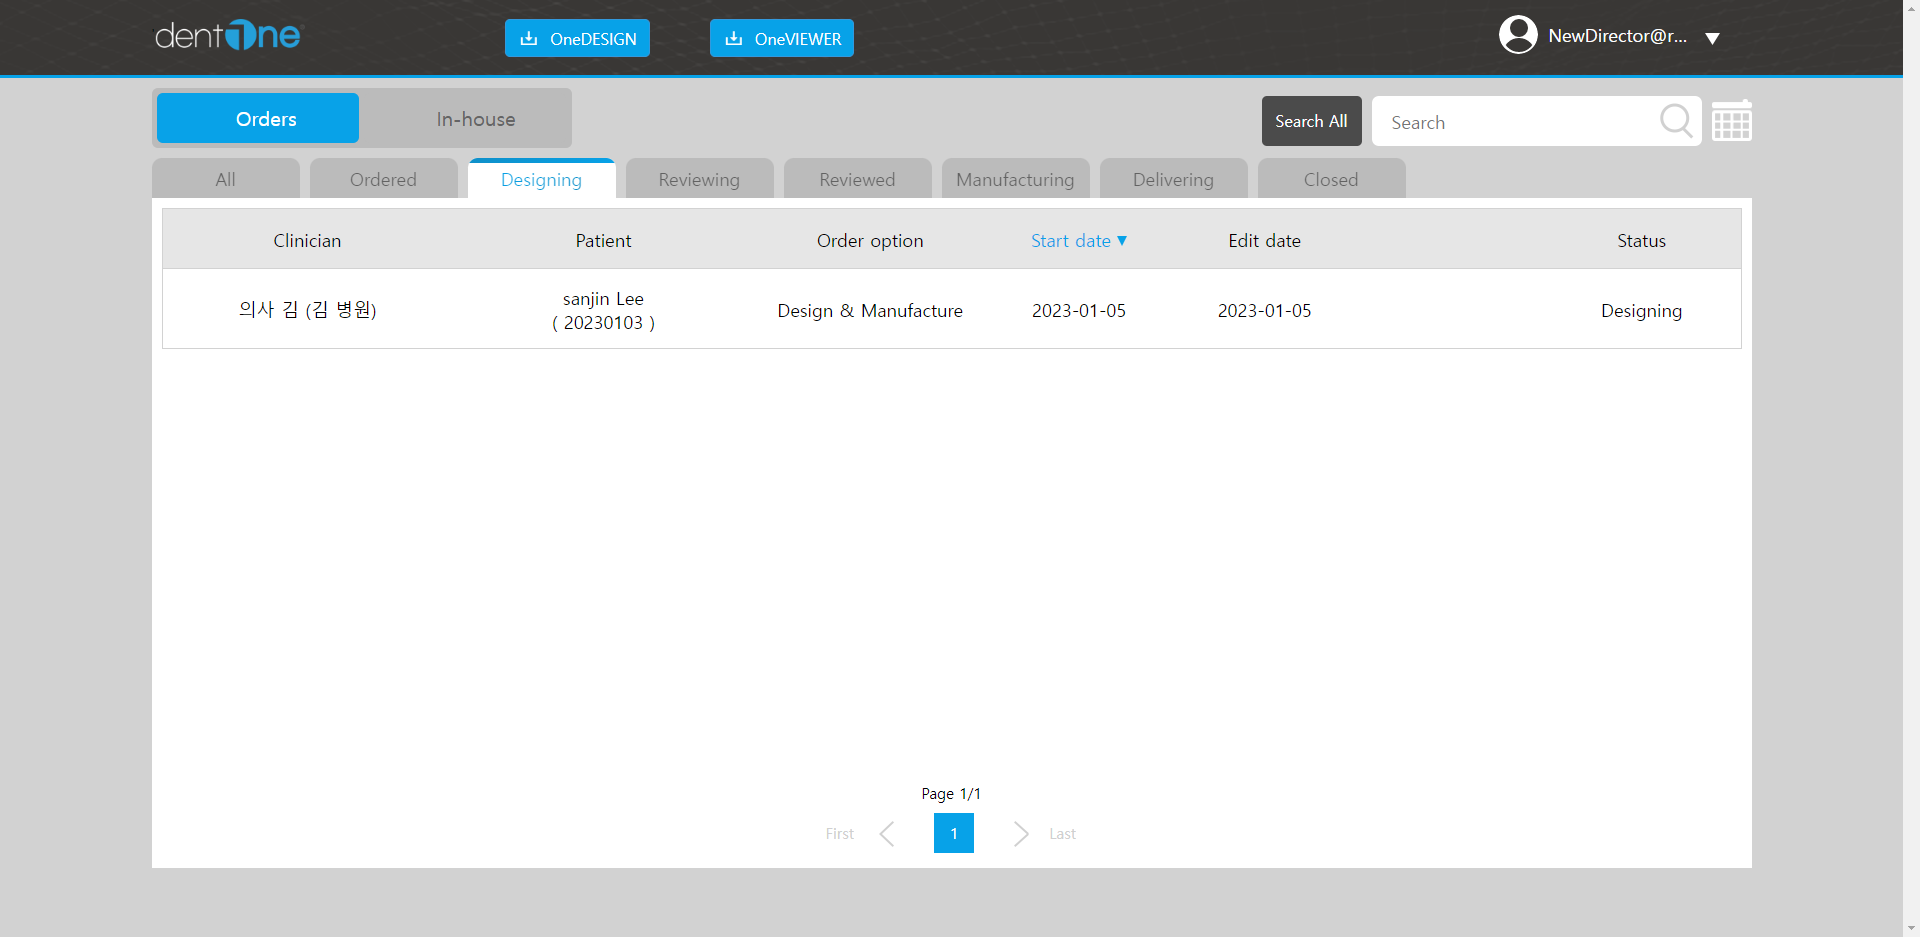
A list of orders under design is displayed.
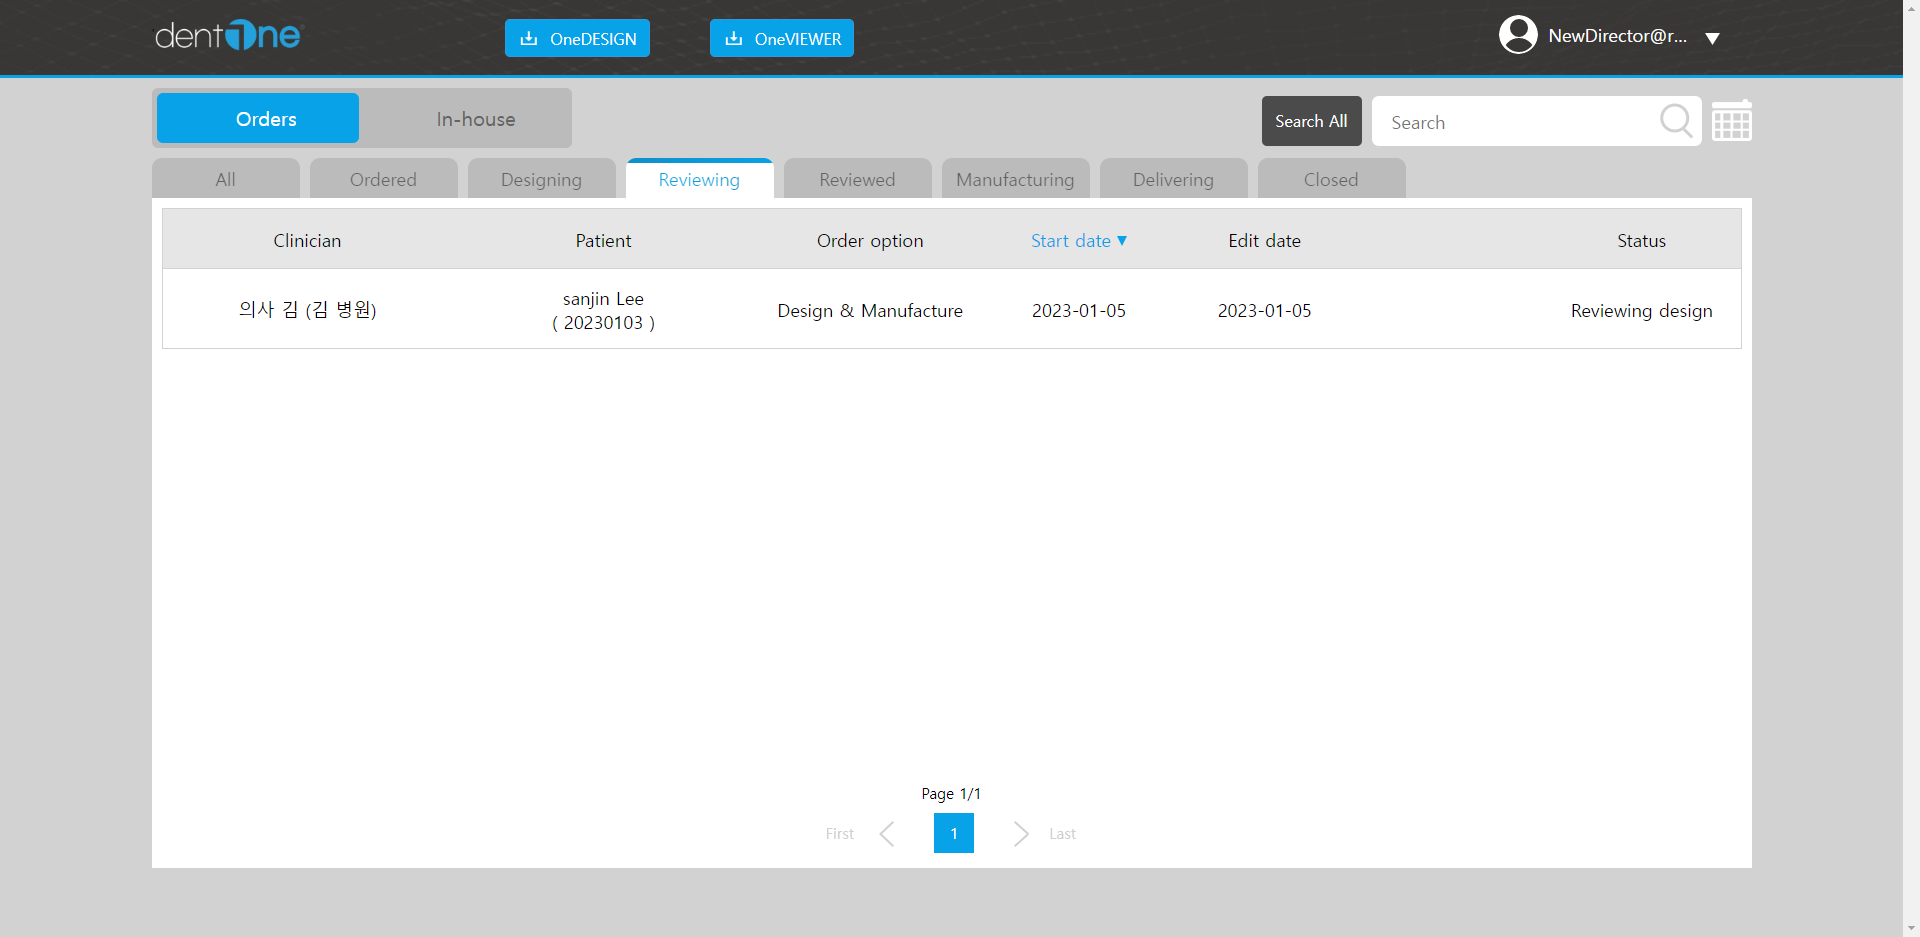
The list of orders that the Clinician is reviewing is displayed.
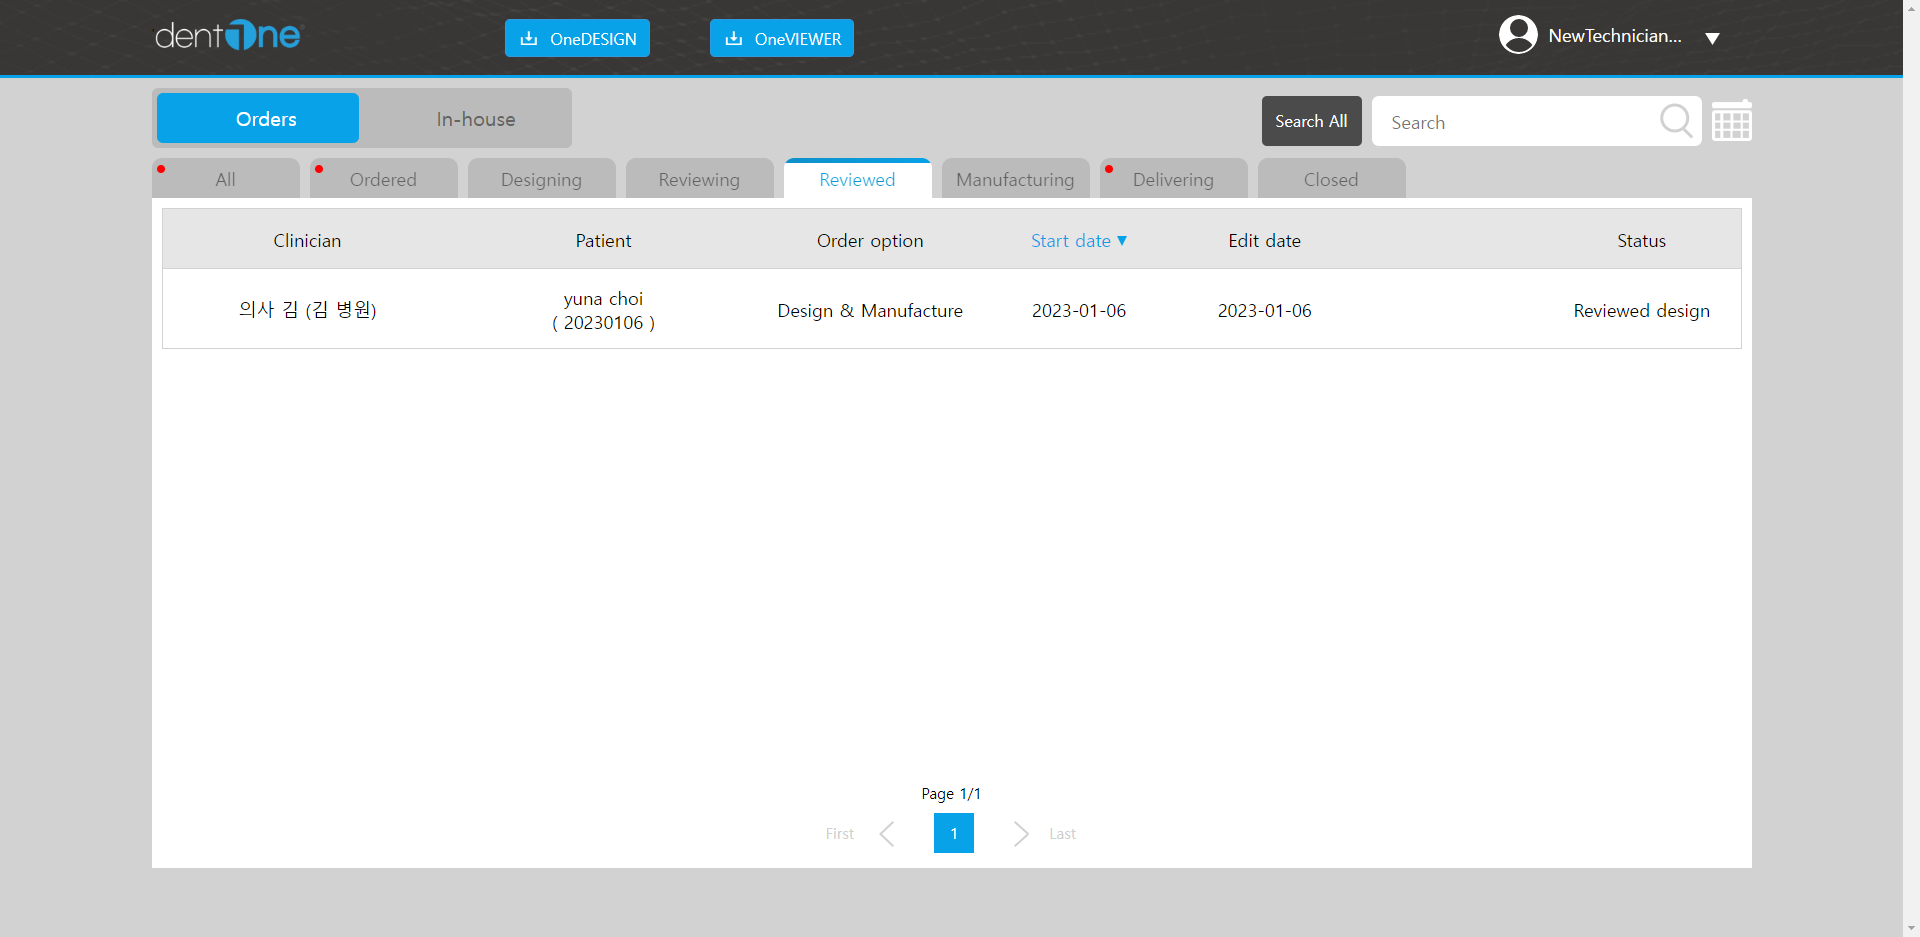
A list of orders confirmed by Clinician is displayed.
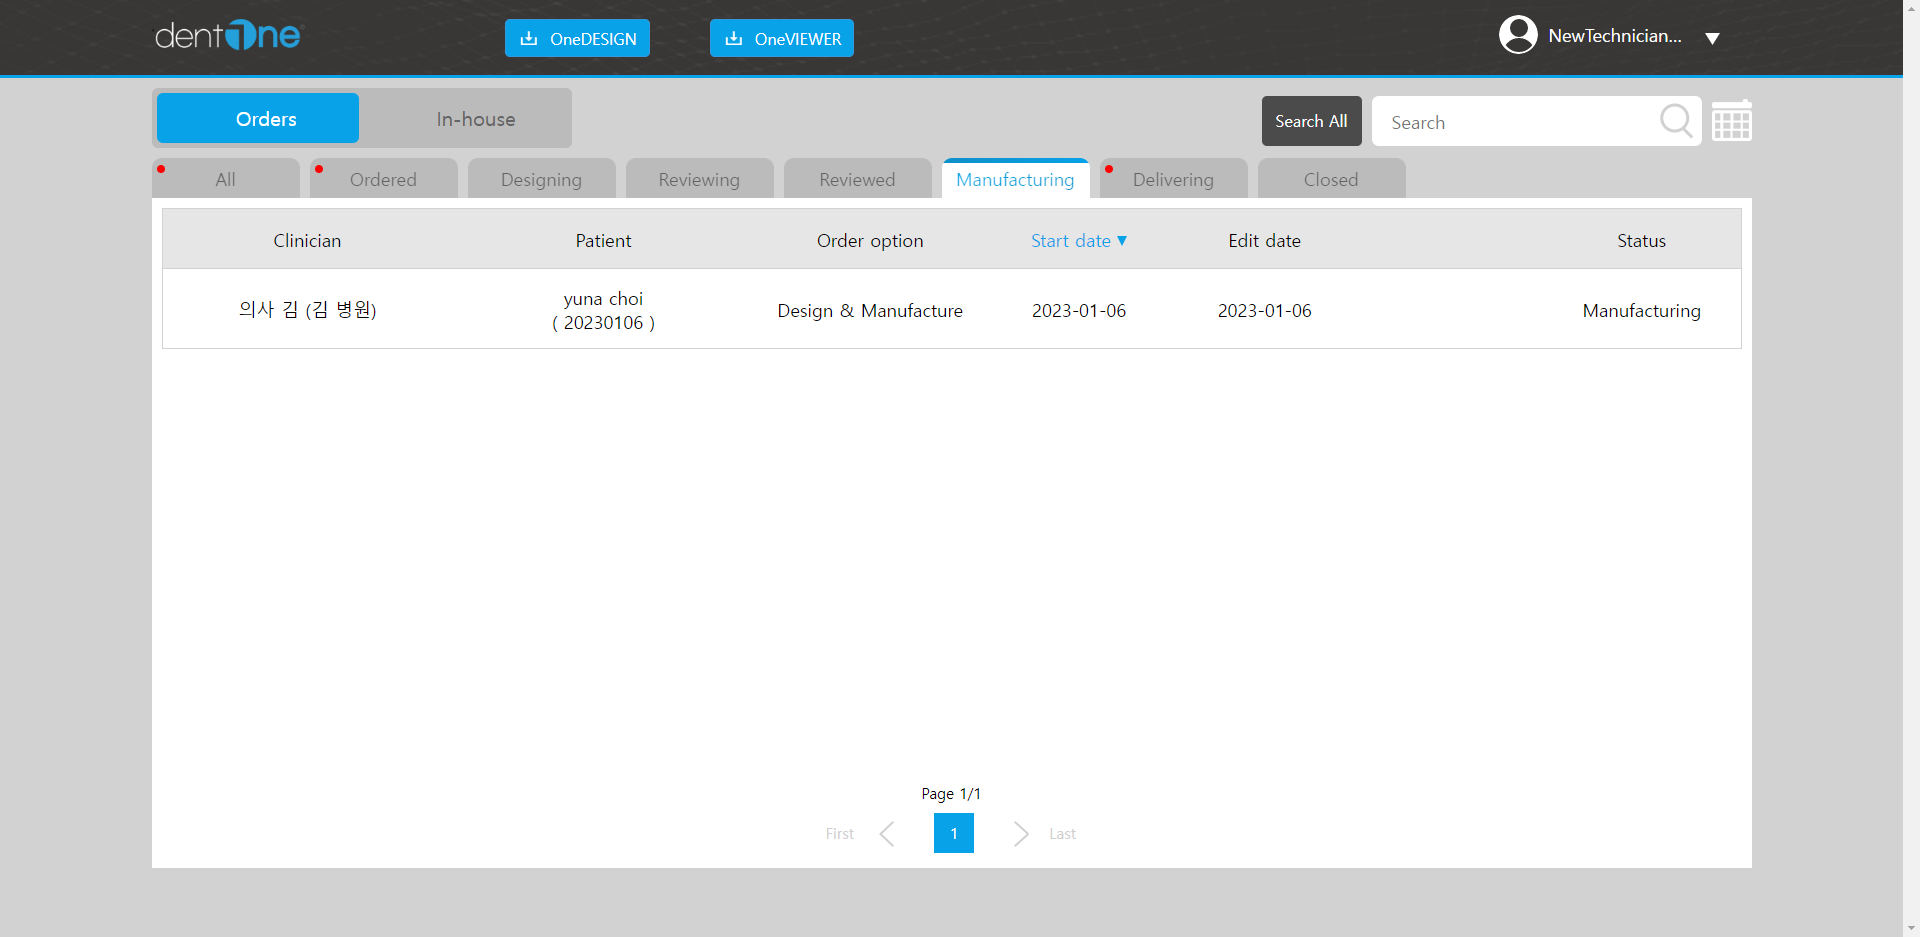
The list of orders that are building the device is displayed.
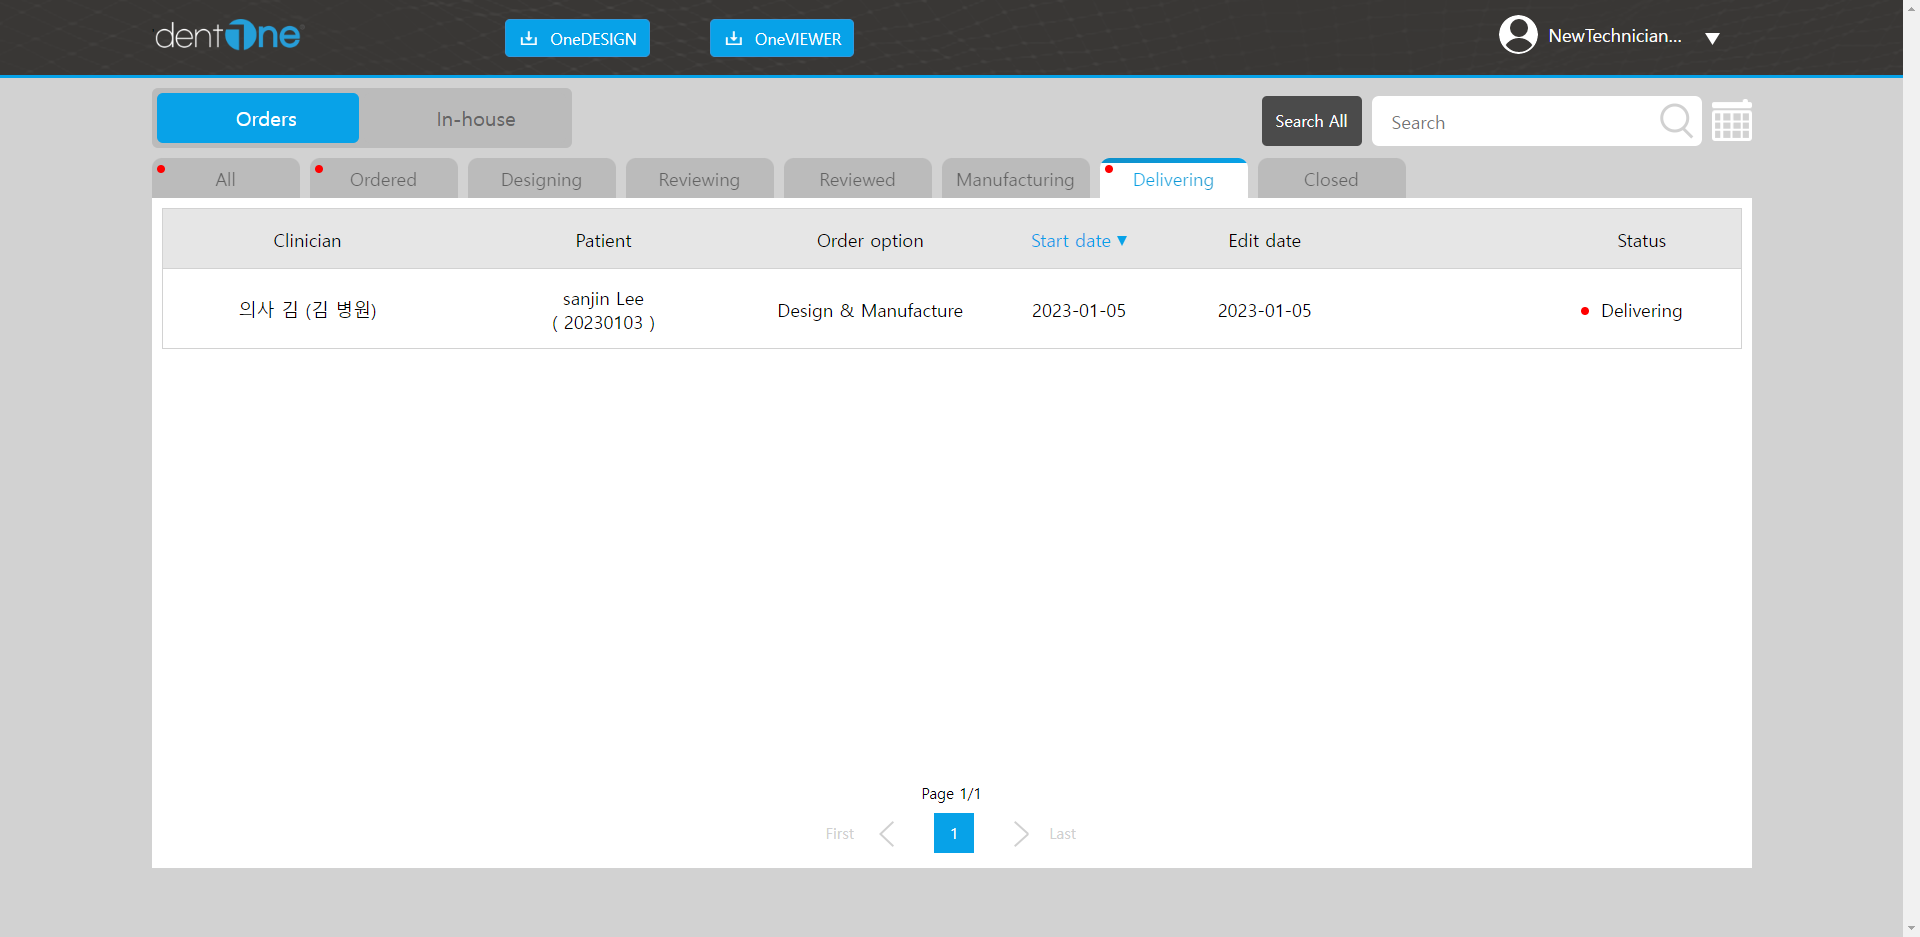
You will see a list of orders being shipped.
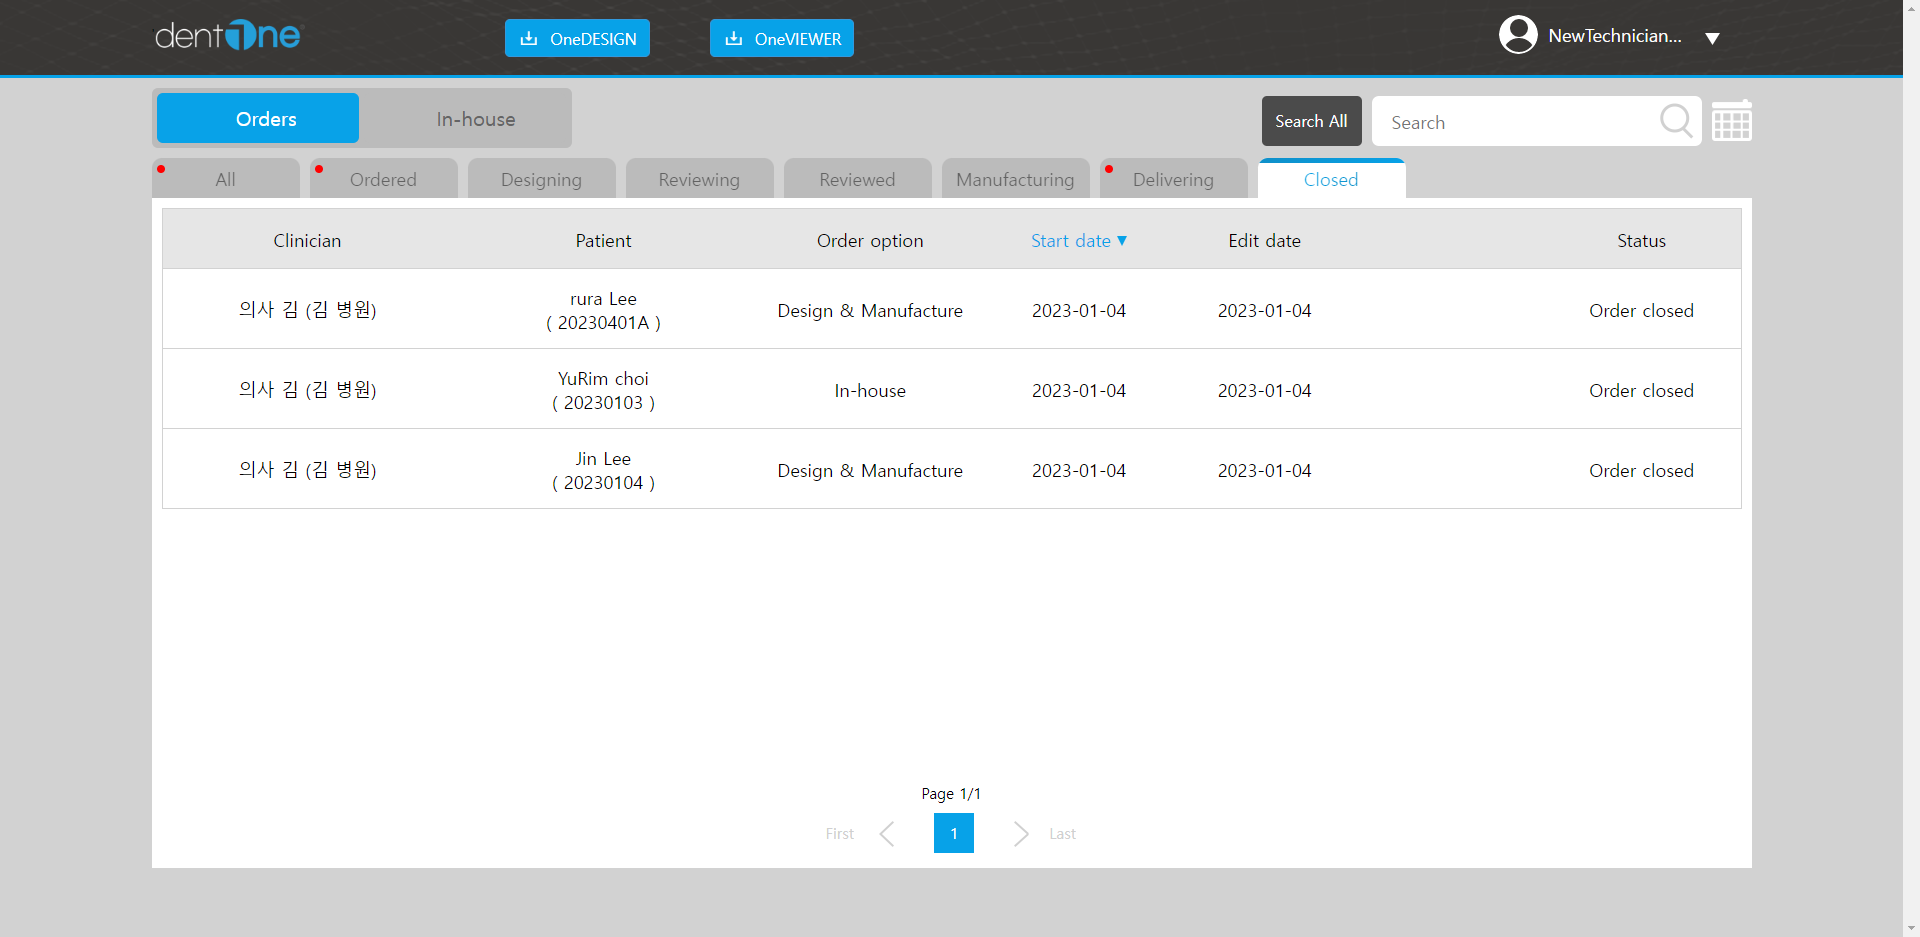
A list of orders that have completed the service is displayed.